To configure the settings on the LAN interface on the 8100, the desktop software must be used to communicate with the module and configure as required.
The 8100 uses a TIBBO Ethernet to VCP bridge, allowing the 8100 to be communicated with both over raw ethernet via sockets, as well as via legacy programs as a Com port using the VCP Drivers.
Using the Tibbo DS Manager software (installers attached to this article), click 'Refresh' on the Auto-Discovery page to find the 8100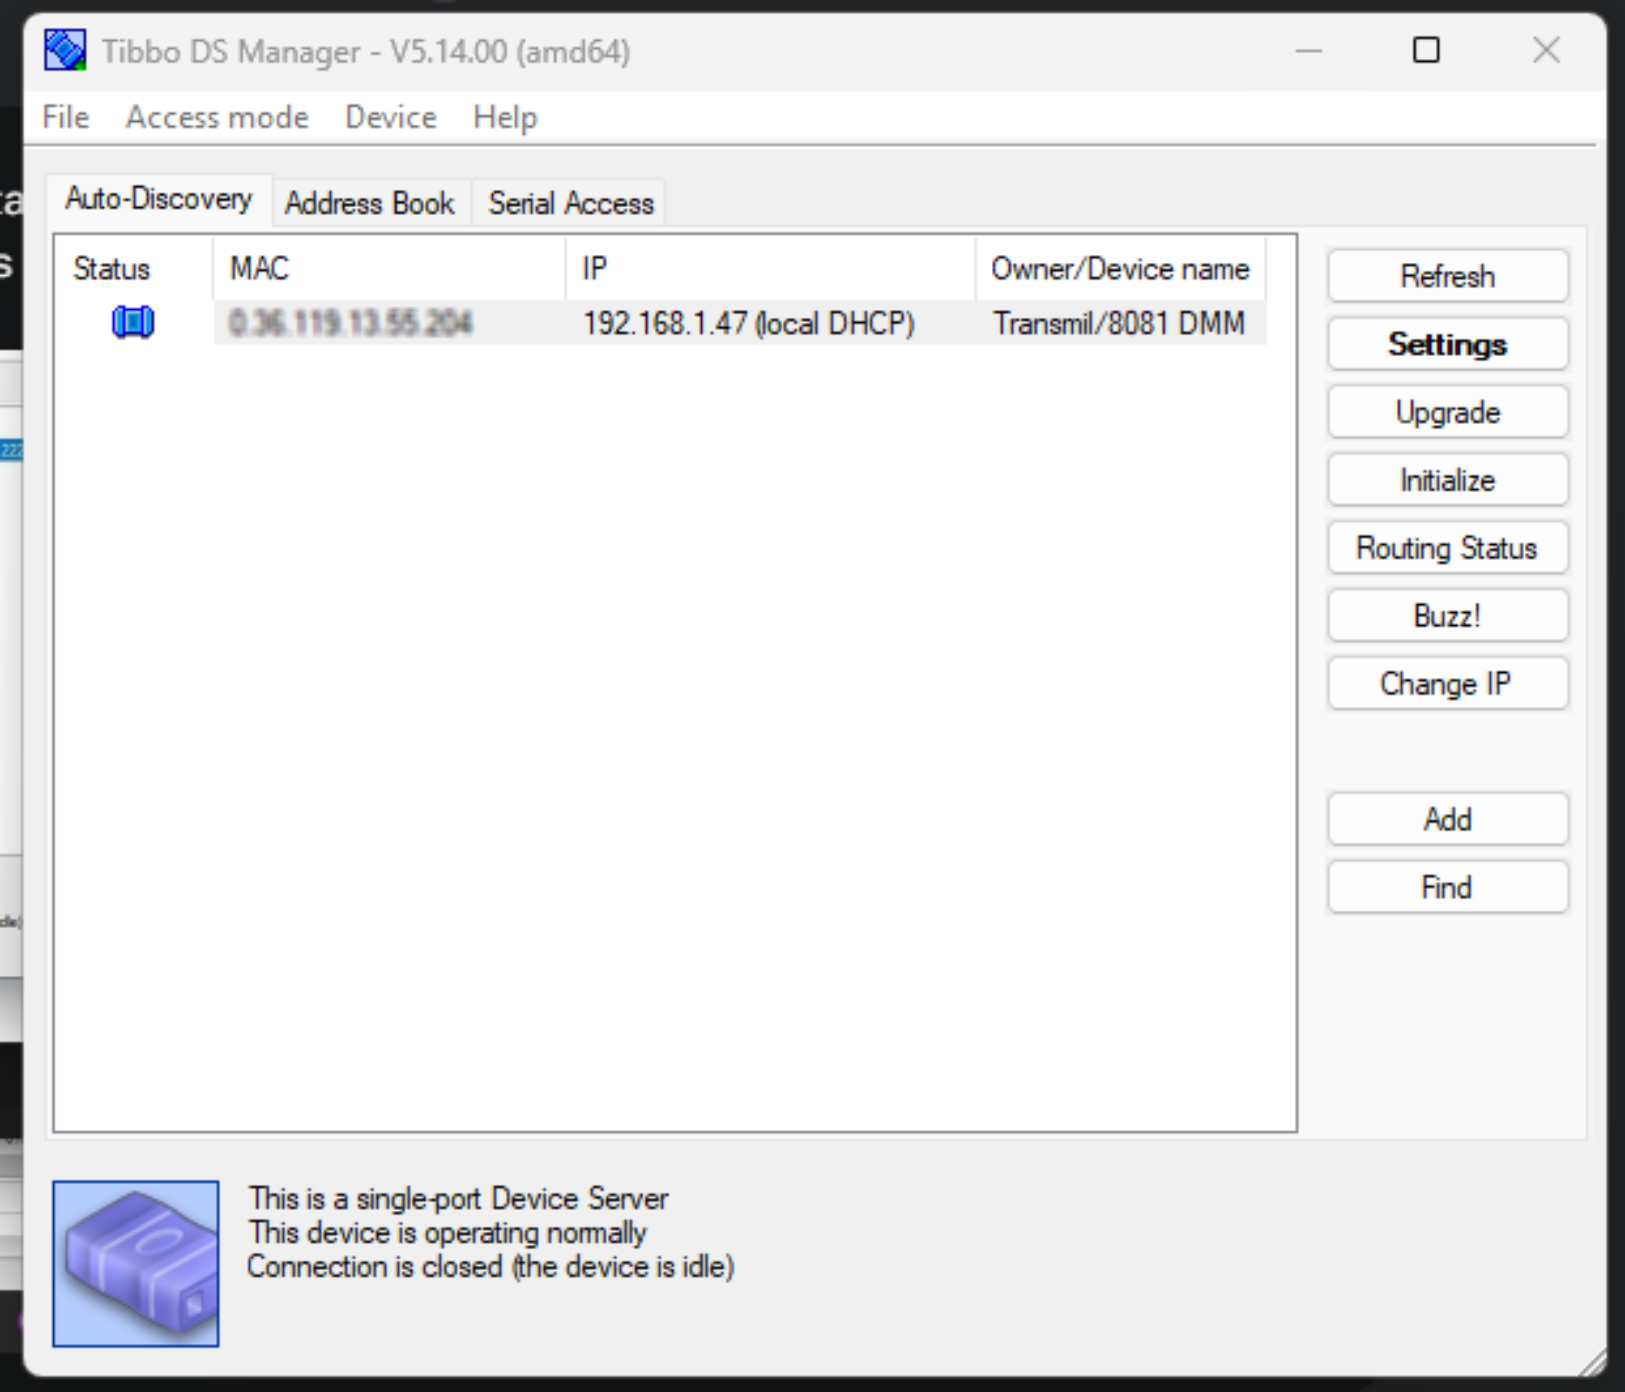
Make a note of the IP Address, if not already configure to DHCP, you will need to edit the settings on your computer to be on the same subnet/range to be able to communicate.
To do this, right click 'Network and Internet Settings' in your taskbar (or navigate to settings), choose your active interface, and then edit the IP address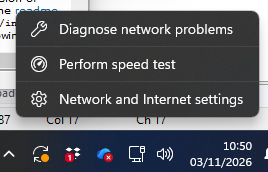
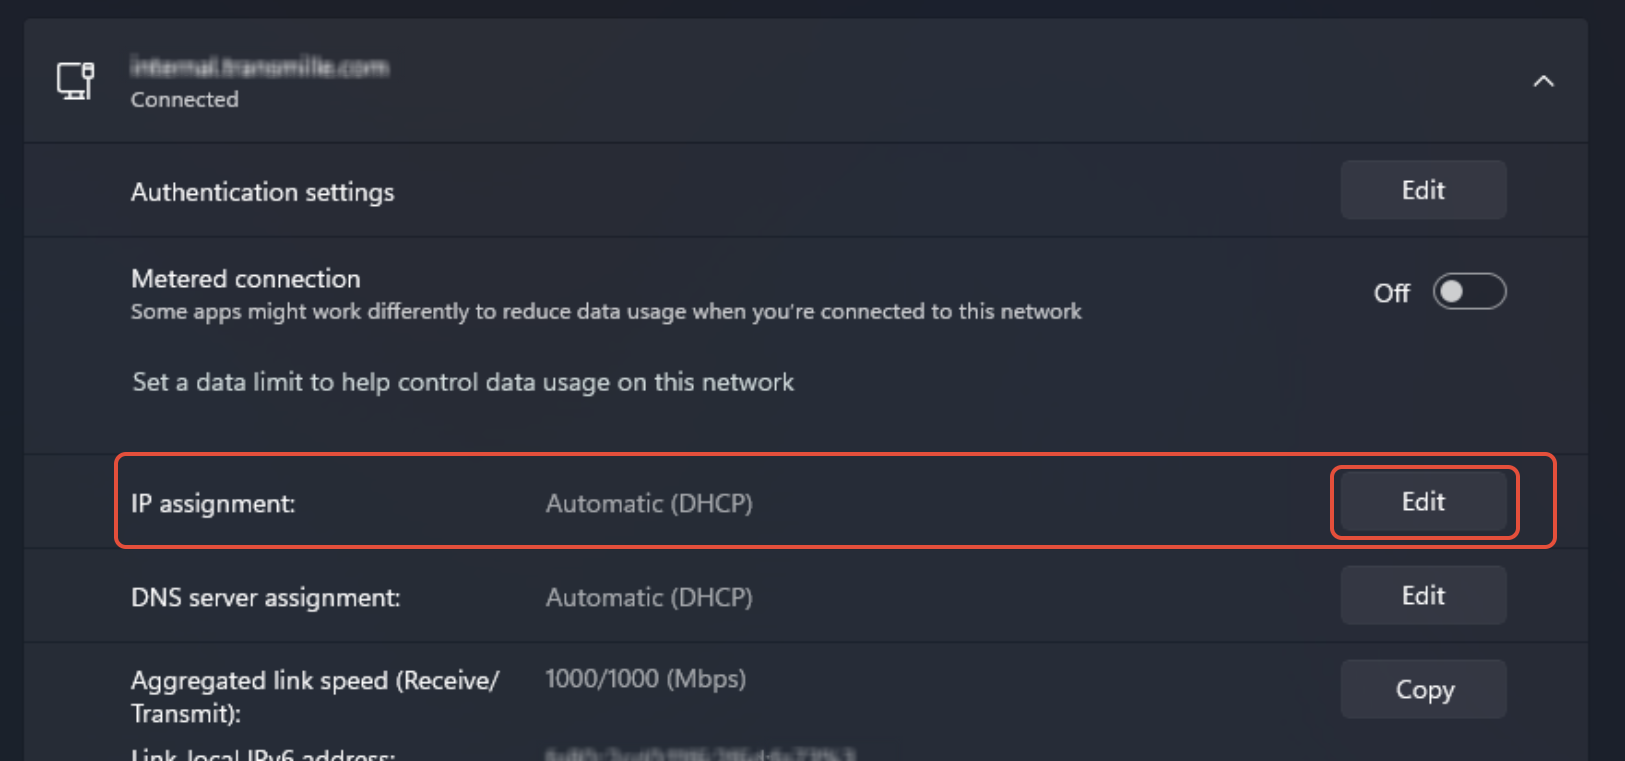
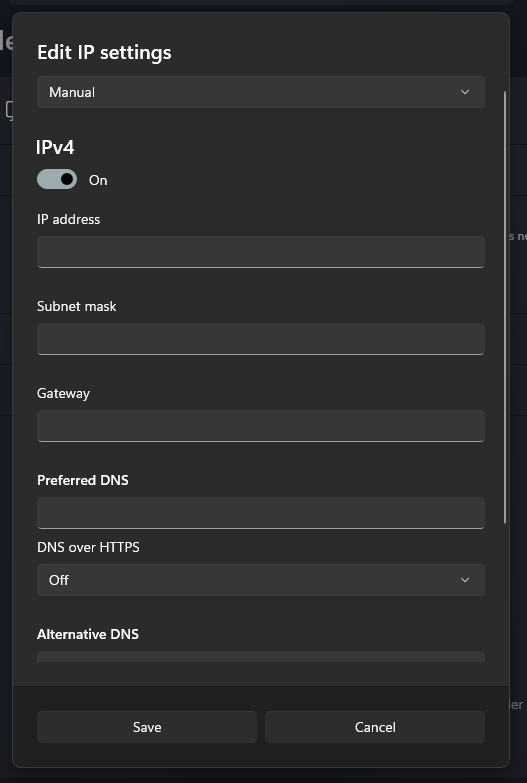
For example, if the multimeter appeared with an IP address of 169.254.221.228, manually set your computer to an IP address of 169.254.221.227 and use a subnet mask of 255.255.255.0 and leave Gateway and other settings blank. Note that you will lose internet access while performing this step.
After configuring your computer, click 'Refresh' in the Tibbo DS Manager and check that the status is now a Blue icon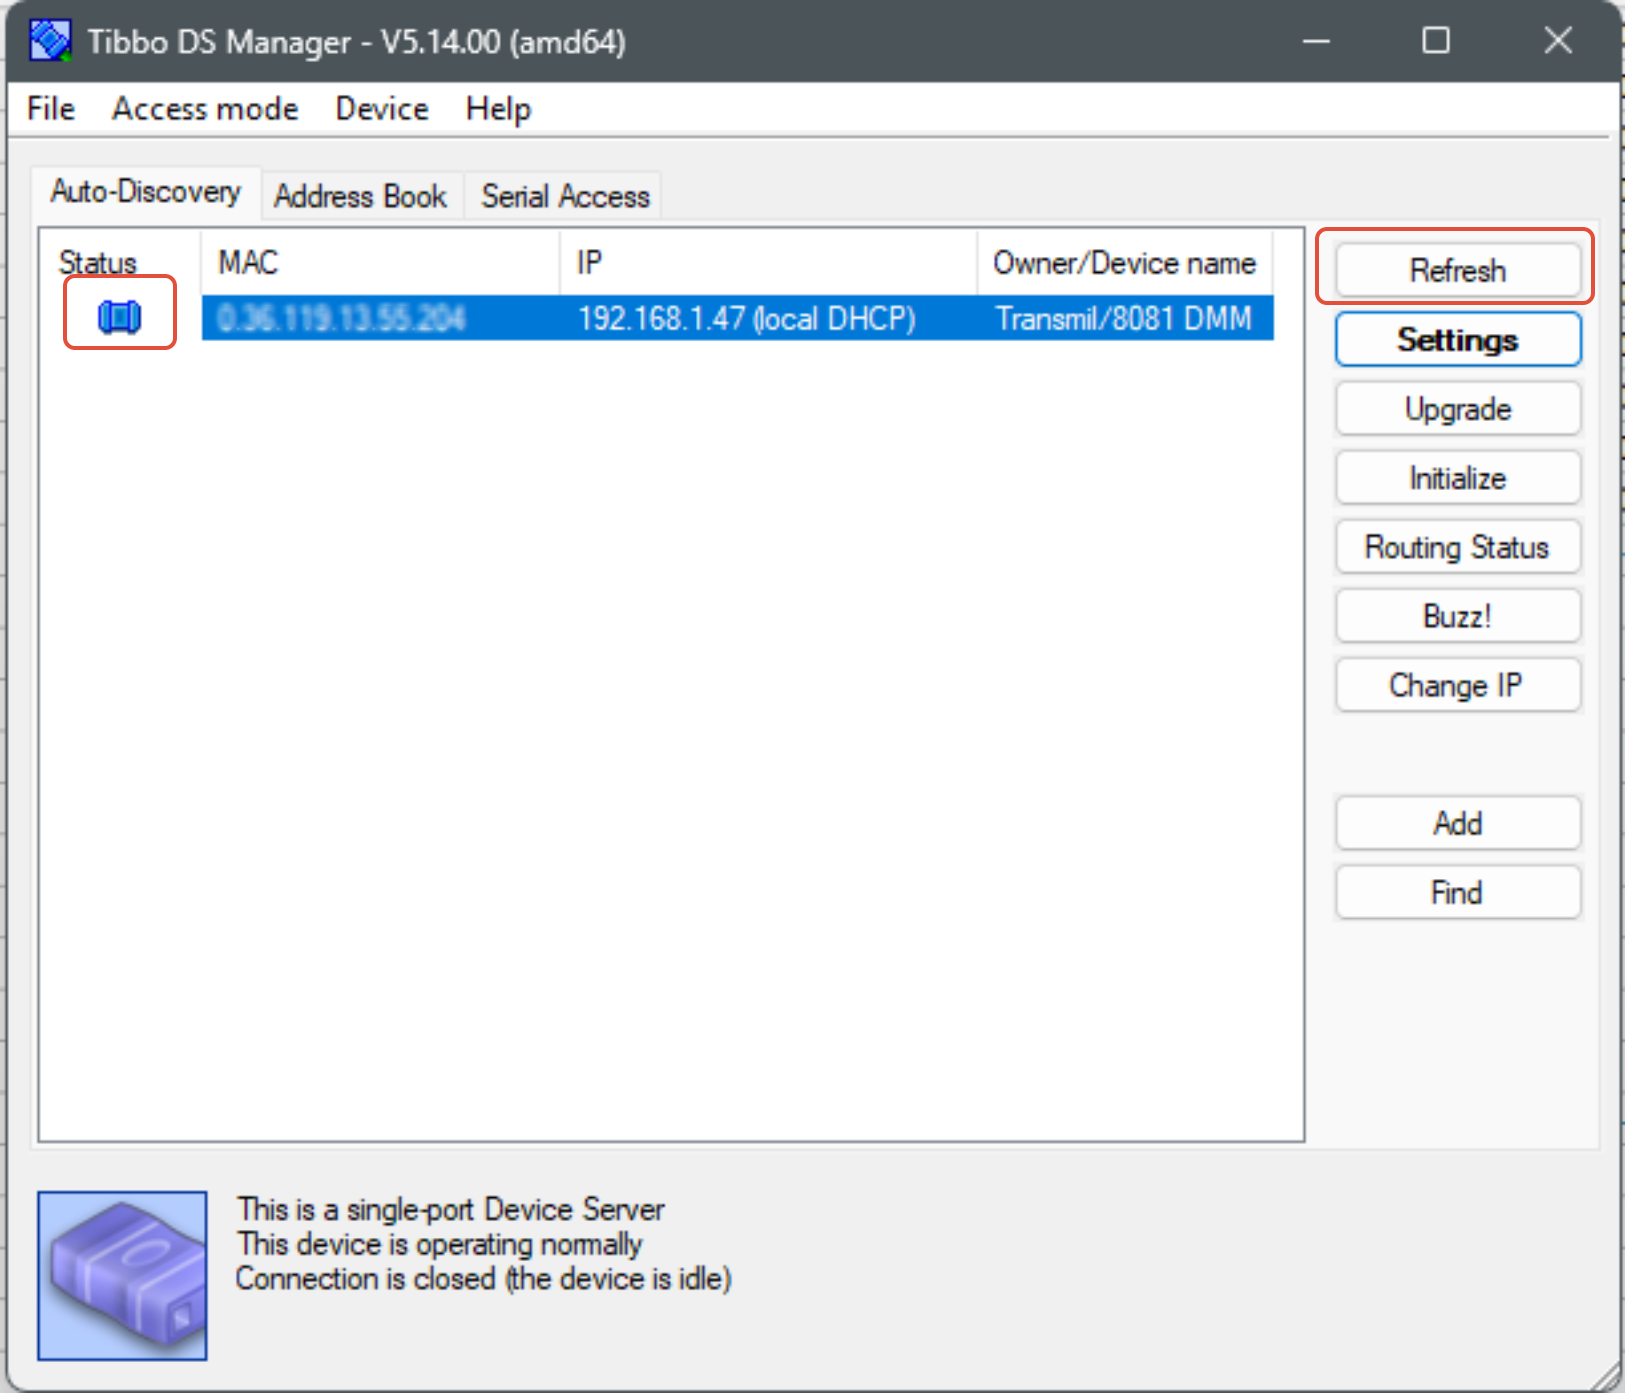
To update the IP address, with the device selected, click 'Settings'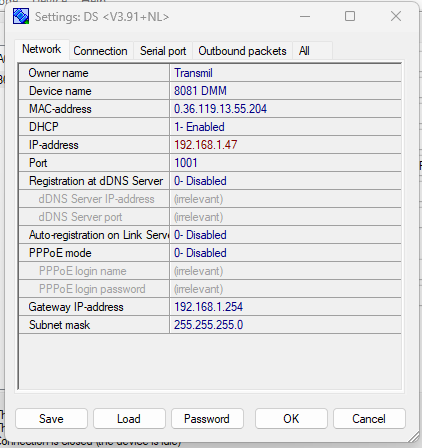
To enable DHCP (automatic configuratiion of IP address when connected to a network), click on the 'DHCP' dropdown and change the setting to '1 - Enabled', and then click Save
Was this article helpful?
That’s Great!
Thank you for your feedback
Sorry! We couldn't be helpful
Thank you for your feedback
Feedback sent
We appreciate your effort and will try to fix the article